

Icecast Radio Setup
Icecast Radio Streaming Setup
Time required – 15 minutes
Brief Introduction of Radio Streaming
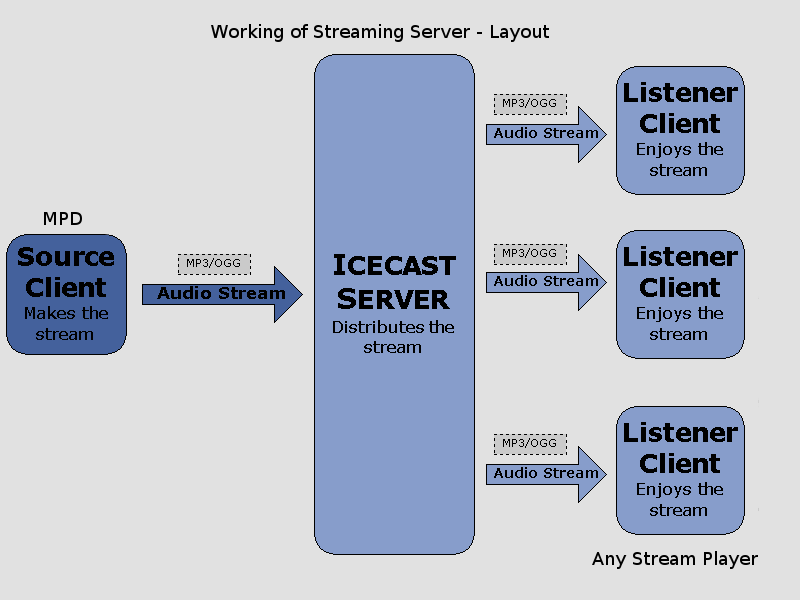
The following image represents how the radio operates. The source client (DJ) using software, sends the audio signal to the server over the Internet. The server then relays this stream to the listening clients. The server has a 10Gbps connection and is able to directly cater for up to 80,000 listeners.
It is therefore important when you are live streaming, that your own connection to the Internet is stable. Whilst streaming over Wi-fi is possible and in most cases sufficient, for some DJs where their Wi-fi connection can drop it is highly recommended that you connect to your router via an ethernet cable. Whilst this will not cover any Internet outtages from your Internet Service Provider (ISP), it will at least ensure that you have a stable connection between your streaming computer and your home router.
Streaming Configuration
This tutorial is an example of how you would set up your computer or laptop for radio streaming. For this you will need:
- Turntables / decks
- Computer
- Streaming software
- (Broadcast Using This Tool) – BUTT – https://danielnoethen.de/butt/
Depending on your setup, you may also require the following if BUTT does not recognise your DJ controller:
- A dedicated USB sound card that BUTT can recognise as an input. You can find a cheap one here – https://www.amazon.co.uk/UGREEN-Headphone-Microphone-Raspberry-Ultrabook/dp/B01N905VOY/
- With the above, a 3.5mm to phono lead. This would go from the master out (or record out) on your mixer, to the above USB sound card.
There is an alternative approach that works in some cases, where we can install a virtual audio cable to route the signals internally around your computer.
Step 1 – Configure Streaming Software (BUTT)
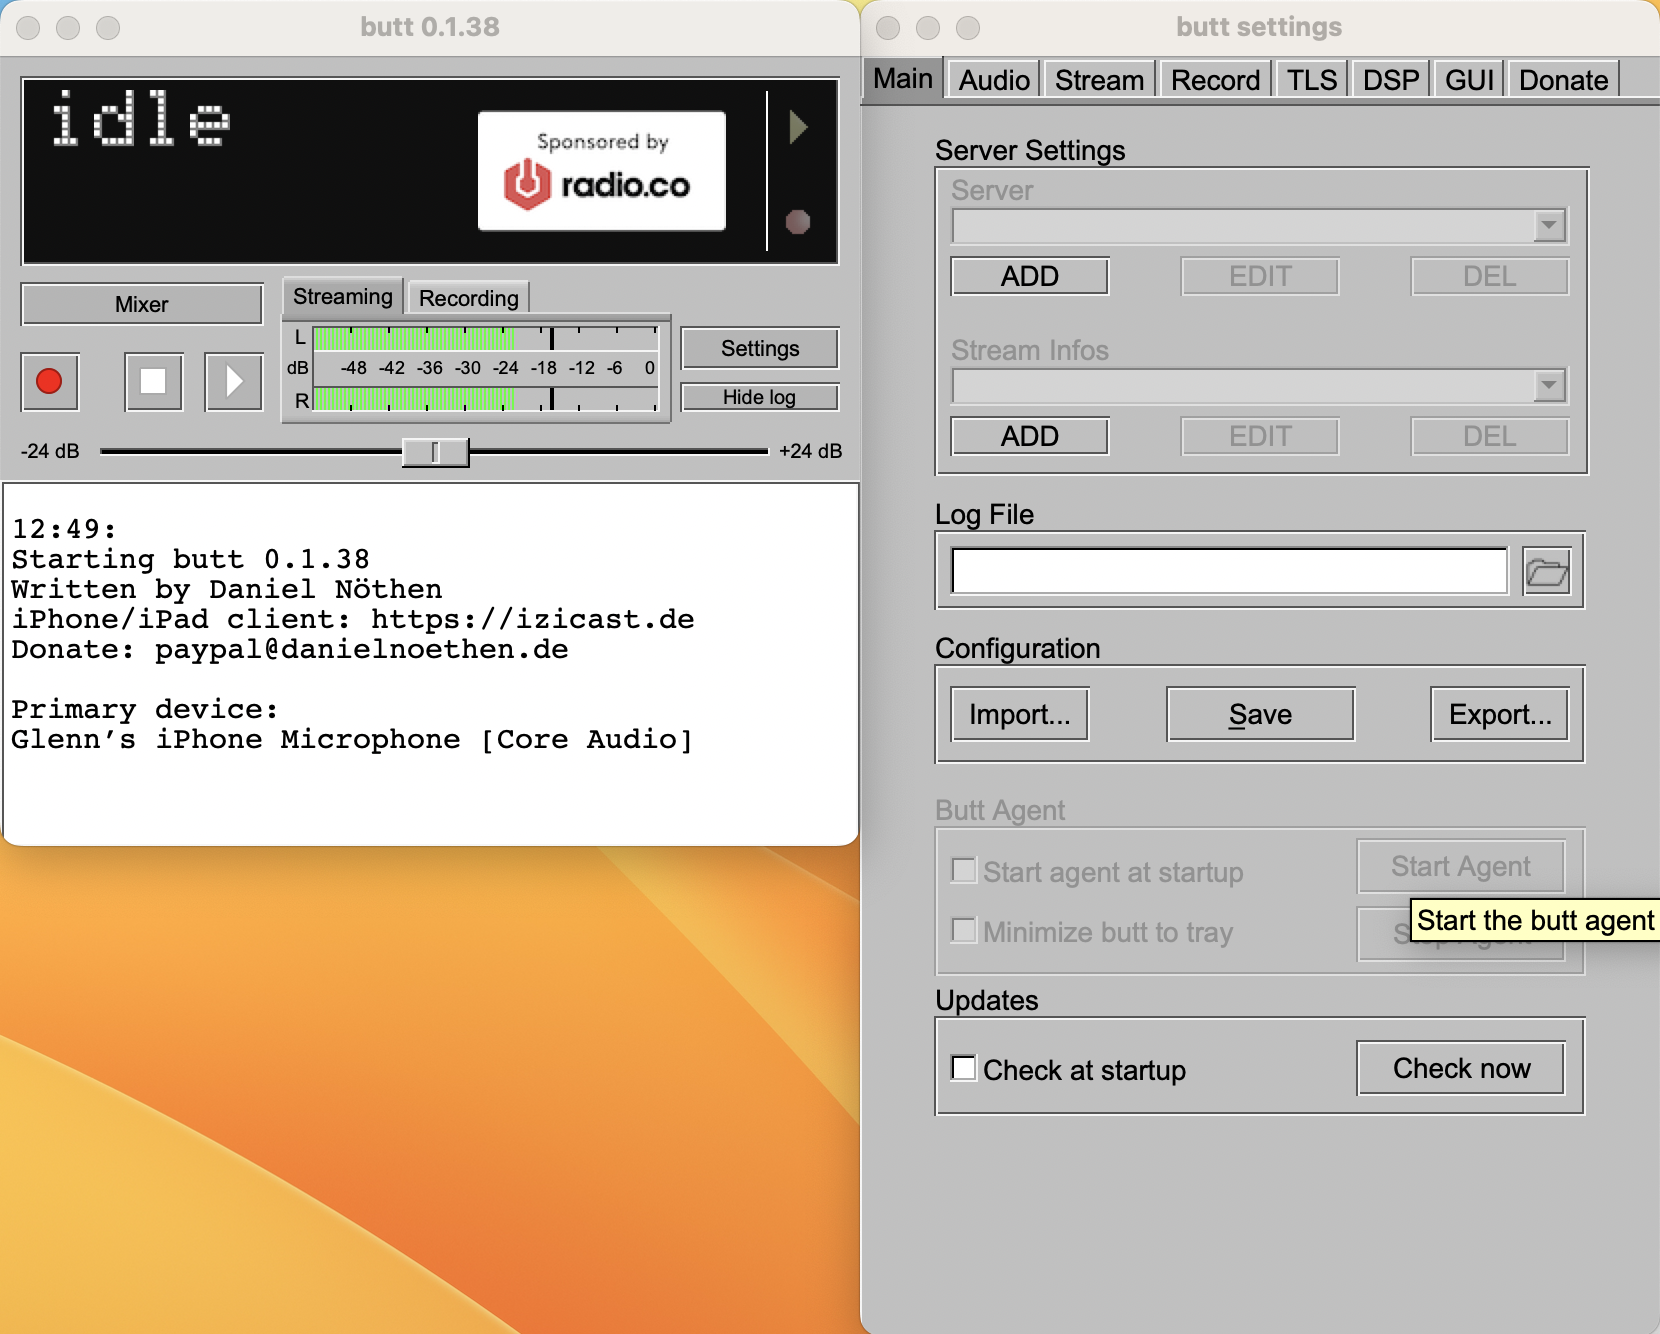
Open the BUTT software and you should be welcomed with this screen.
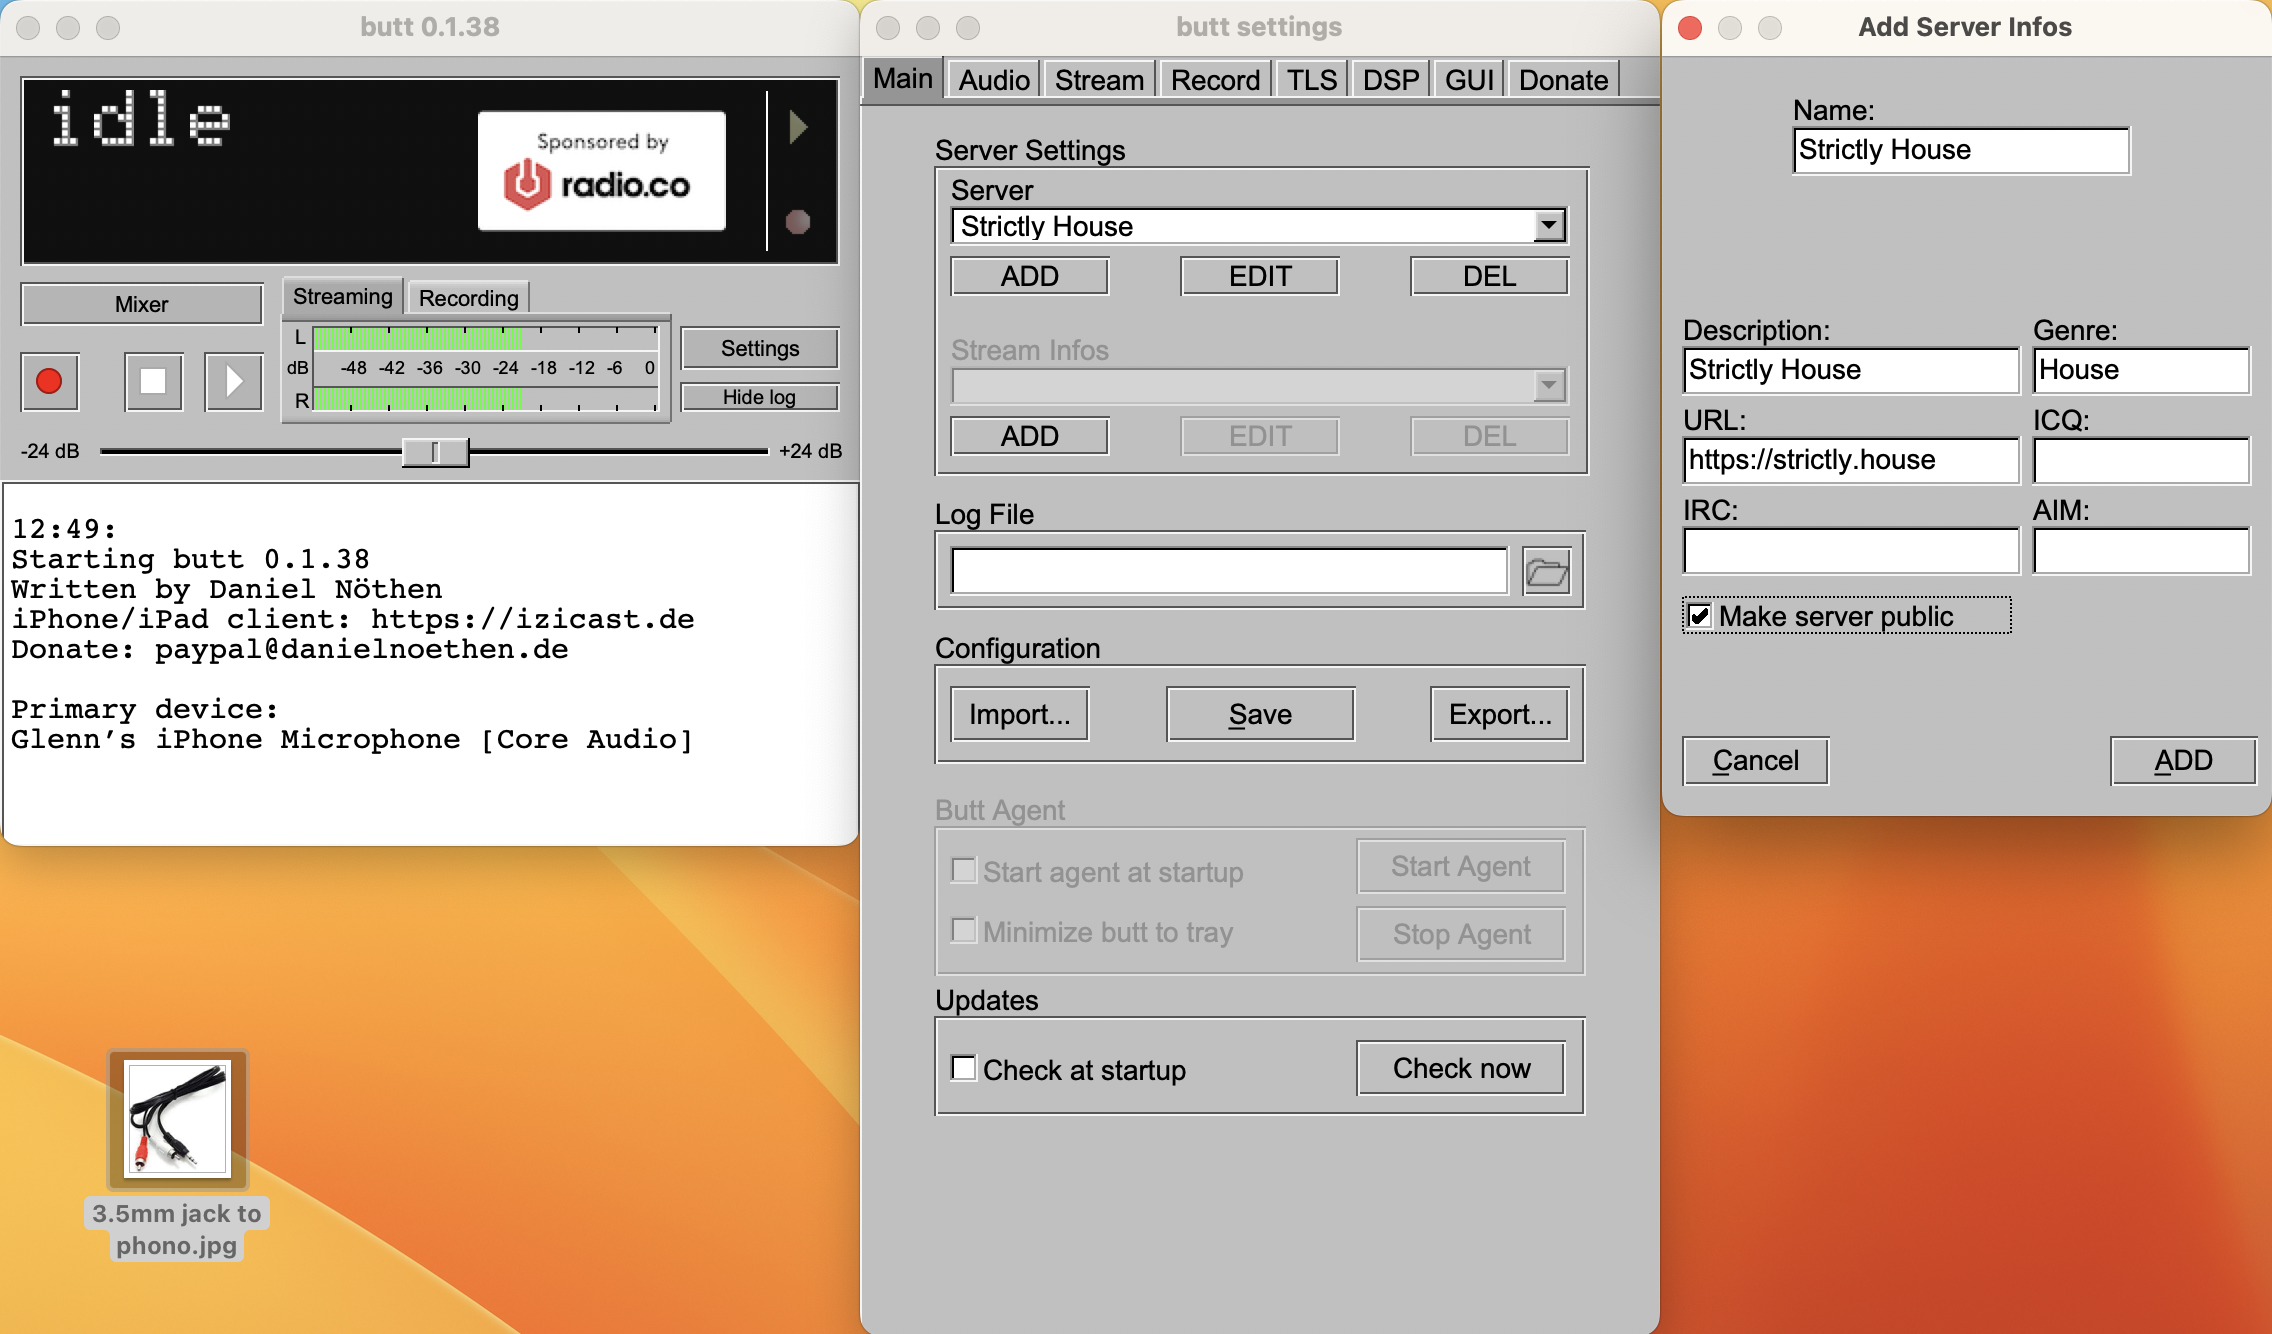
The next step would be to click “ADD” under Server Settings. This allows your computer to connect to our radio streaming server (which then serves the music to the listeners). The settings for the server are as follows. Click “ADD” once done:
Address: http://radio.strictly.house
Port: 9990
Password: StrictlyHouse
Icecast mountpoint: live
Icecast user: source
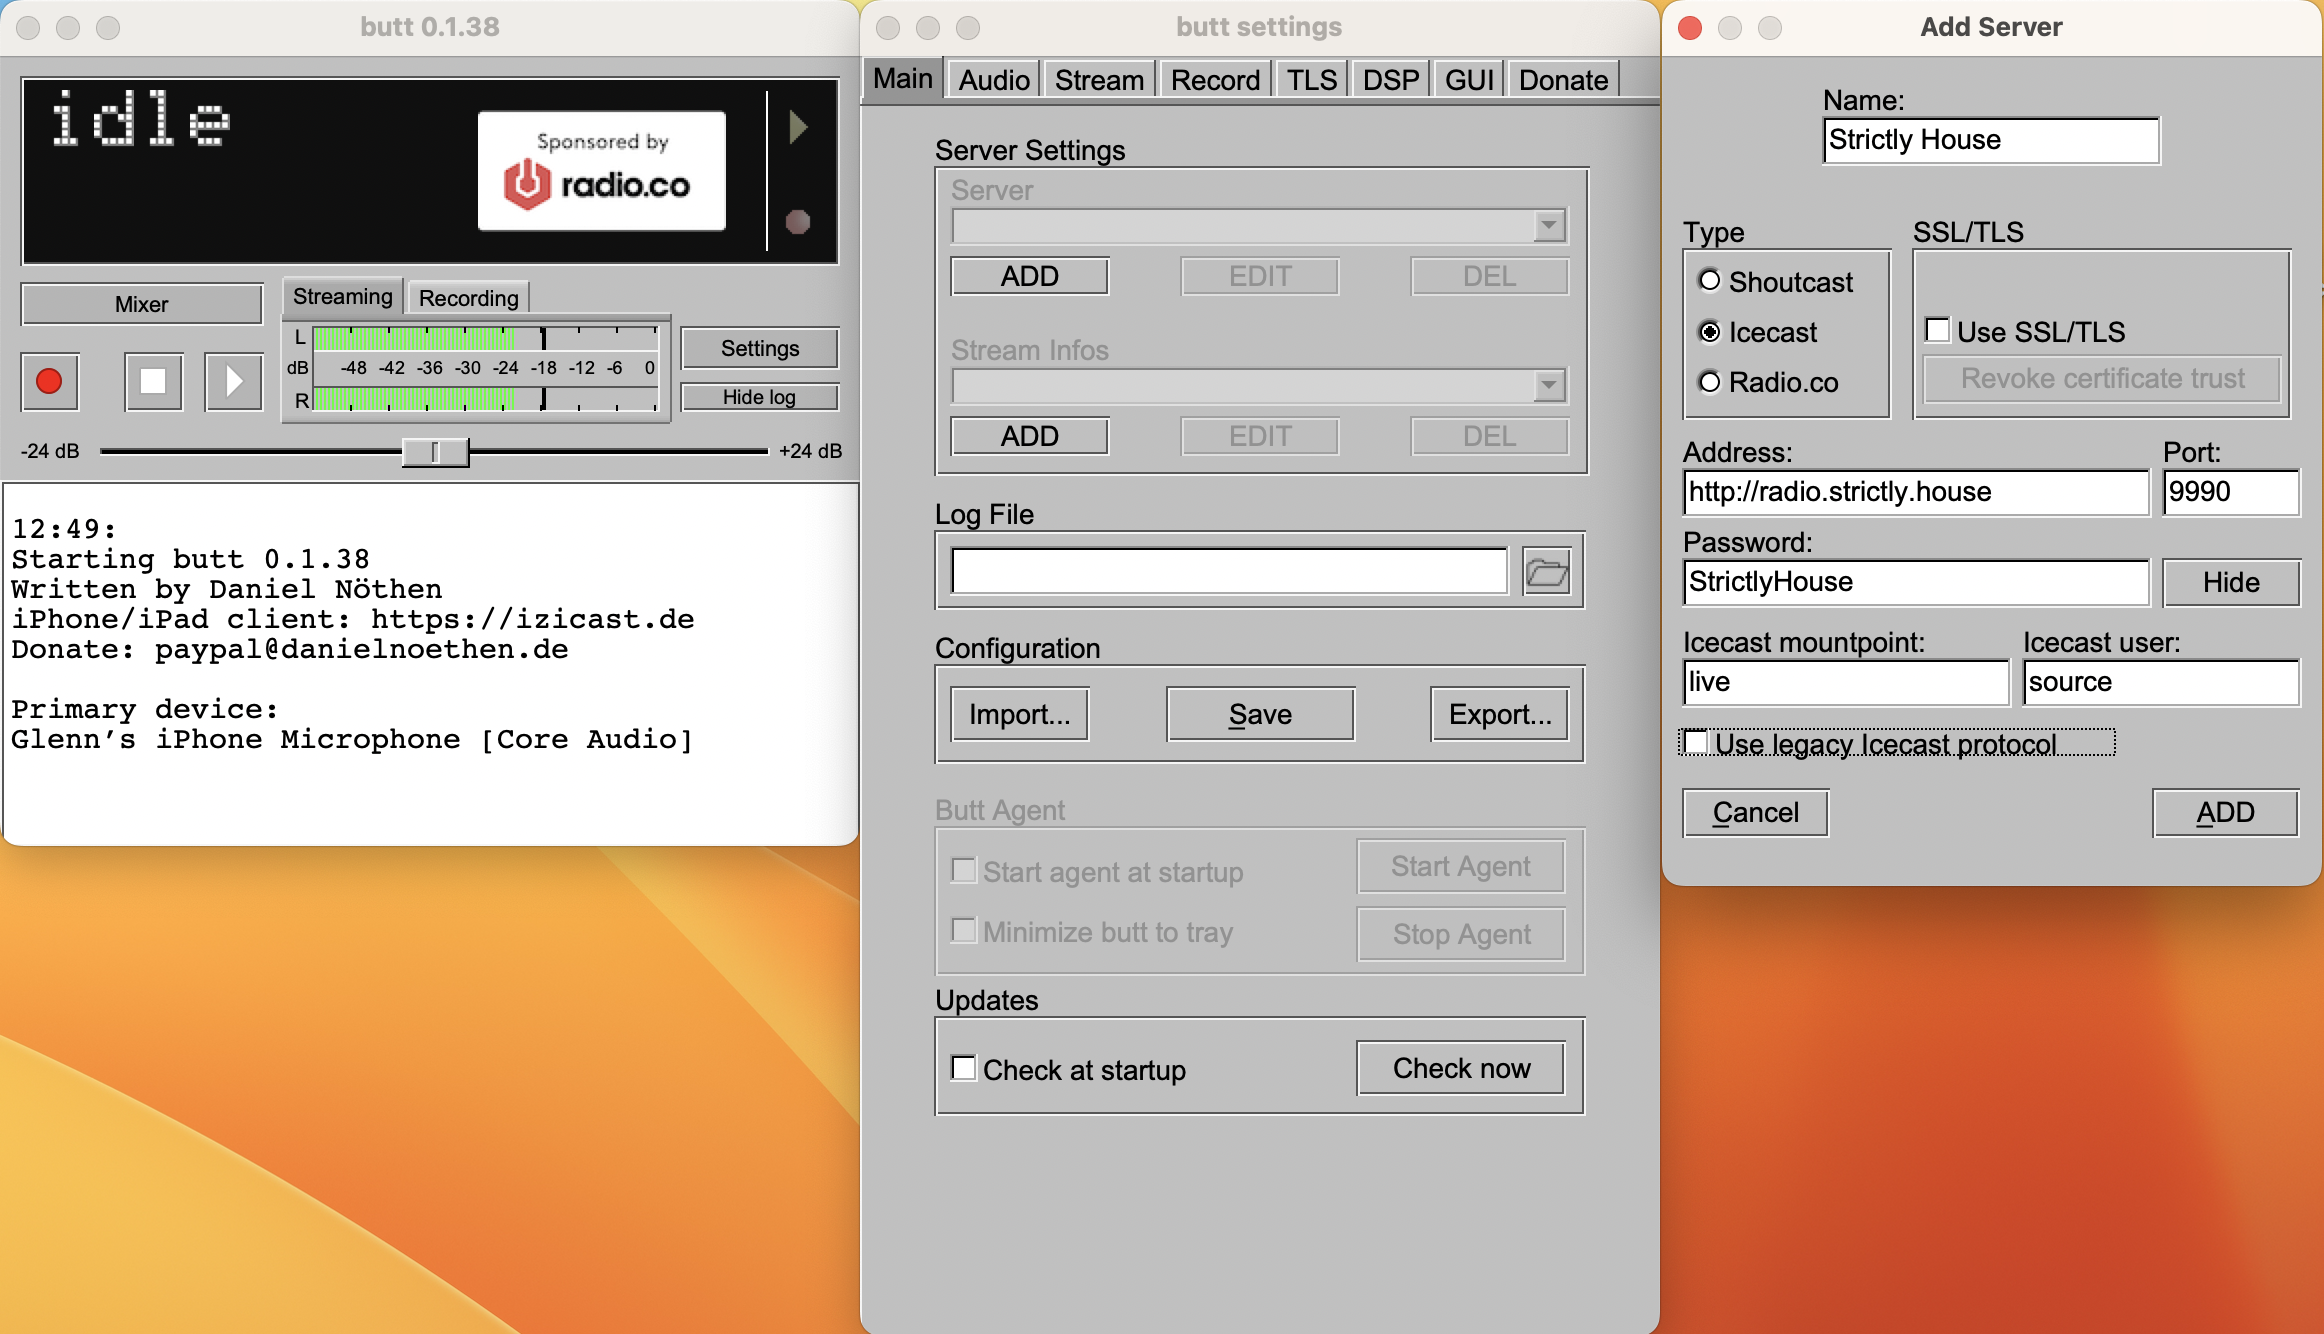
Next, you will need to add the public server info stream settings (Stream Infos). Again, click “ADD” and punch in the following settings:
With those two lots of configurations entered, best click “Save” at this point. You will need to click save again once you have configured your audio settings below.
IMPORTANT
For most people that use a DJ Controller, for instance the Pioneer range, you would select your device in the drop-down box. When you have selected your device, you should then play a track on your decks ensuring that it is playing out on the master channel. All things being well, you should see the level meters on the right peak from green to red. This means that the software is correctly picking up your audio signal.
If no signal is being picked up then you will need to find some other means of gathering the output signal from your turntables to BUTT. One example is the USB sound card that was mentioned at the start of this article. If your computer has a 3.5mm microphone jack port, it may also be possible to pick up the signal by using this. YOU MUST BE ABLE TO ESTABLISH AN AUDIO SIGNAL.
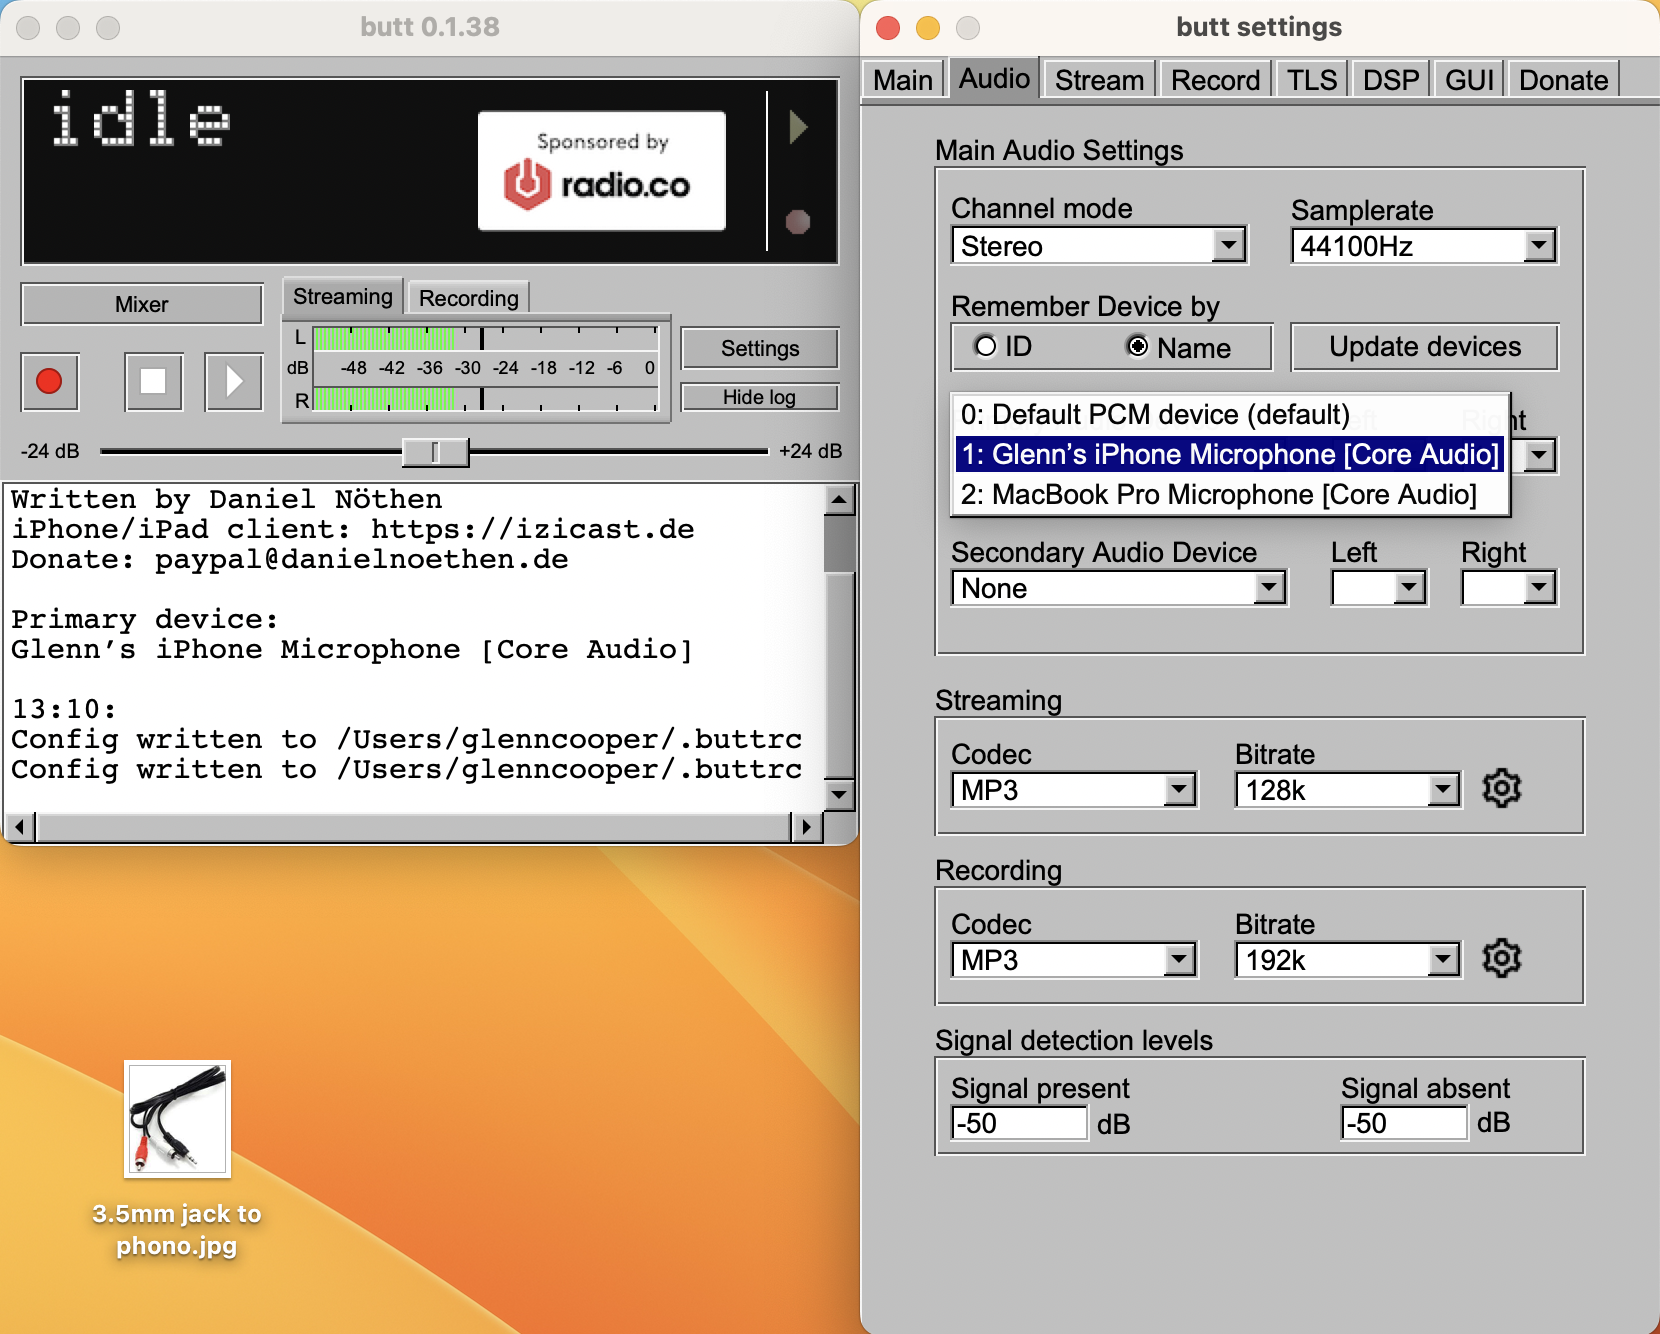
At this point with a valid audio signal, you should then click on the “Main” tab, then click Save under configuration. We are now ready to stream to the server.
Streaming
With all the settings in place, click on the play button on the main BUTT screen, this will open the connection with the server and the software will inform you of a successful connection with a message “Connection established”. If the software does not connect, then you should double check the server settings above.
![]()
With a successful connection, the next step would be to play music from your studio. At this point you should see the level metre move from green to yellow to red depending on how loud your signal is. The ideal level would be around -6db for the testing environment. Once you have your levels peaking around this mark, you can then check your connection by listening to the stream from another device (i.e. mobile) – http://radio.strictly.house:9990/stream
The live stream should be checked to make sure it’s not the microphone is passing the signal (most common fault), and that it’s an actual audio signal from your decks.
That’s it! Easy?!